

Ceiling tiles can influence the appearance, acoustics, lighting, and everyday function of an interior space. Suspended ceiling systems are especially useful when a room needs convenient access to wiring, ventilation, lighting, and other services above the finished ceiling. A 2×2 ceiling tile provides a compact square format that can create a balanced grid pattern across different types of rooms. This format can work well in offices, classrooms, basements, retail areas, studios, and selected residential spaces. Choosing the appropriate material, surface finish, acoustic properties, and layout can help create a ceiling that combines practical access with an organized interior appearance. Understanding Square Ceiling Tiles Square ceiling tiles are designed to fit into a compatible suspended grid system. Their repeated arrangement creates a consistent pattern that can make a room look structured and coordinated. The square format can also make it easier to position lighting fixtures and other ceiling components. When the grid is carefully planned, air vents, speakers, access panels, and lights can be arranged without disrupting the overall pattern. Before selecting a tile, it is important to check the dimensions of the existing grid. Ceiling systems are not universally interchangeable, so the tile should be compatible with the supporting framework. Choosing the Right Material Ceiling tiles are manufactured from various materials, each offering different characteristics. Mineral fiber tiles are often used where sound absorption is important. Metal tiles can provide a more contemporary appearance and may be appropriate for certain commercial environments. PVC and other synthetic materials may be considered in areas where moisture resistance is needed, depending on the product specifications. Decorative tiles can also feature patterns, textures, or specialized finishes. The room’s conditions should guide the material selection. Moisture exposure, acoustics, durability, cleaning needs, fire performance, and visual appearance should all be considered together. Planning the Grid Layout The suspended grid determines how the tiles will be positioned throughout the room. A carefully planned layout can make the ceiling appear more balanced. It is generally useful to determine the center of the room before installing the grid. Working outward from the center can help create more evenly sized edge sections. The location of walls, columns, lighting fixtures, vents, and other fixed elements should also be considered. If the grid is planned without accounting for these features, the final arrangement may require unnecessary cutting. Accurate measurements can help reduce waste and create a more consistent appearance. Using Lighting Effectively Lighting and ceiling layout should be planned together. Square ceiling systems can accommodate compatible recessed or modular lighting fixtures that align with the grid. In offices and classrooms, even illumination may be important for desks and work surfaces. In residential or entertainment spaces, decorative lighting can be combined with ceiling fixtures to create different layers of illumination. LED fixtures can also be integrated into many suspended ceiling systems. The appropriate light level and color temperature depend on the room’s purpose. The position of each fixture should be considered in relation to furniture, work areas, pathways, and natural light sources. Improving Acoustic Performance The ceiling can play a significant role in the way sound behaves inside a room. In classrooms, offices, conference rooms, and shared spaces, acoustic performance can influence comfort and communication. Some ceiling tiles are specifically manufactured to absorb sound. Their surface structure and internal composition can help reduce sound reflection, although performance varies by product. Acoustic planning should not focus on the ceiling alone. Walls, flooring, furniture, windows, and other surfaces also influence the overall sound environment. When selecting tiles for a busy room, it can be useful to consider the manufacturer’s acoustic ratings and the needs of the space. Using Tiles in Office Interiors Offices frequently use suspended ceilings because they need access to electrical wiring, data cables, ventilation systems, and lighting. A square tile grid can create a uniform appearance across open work areas. Different sections of the ceiling can also accommodate lighting based on desk arrangements and meeting areas. Acoustic products may be useful in open-plan workplaces where multiple conversations and activities take place simultaneously. The ceiling finish can be coordinated with wall colors, flooring, furniture, and partitions to create a consistent workplace design. Basement Ceiling Applications Basements often contain pipes, ducts, electrical wiring, and other building services. A suspended ceiling can cover these elements while preserving access when maintenance is needed. Square tiles can be removed individually in many systems, allowing technicians or homeowners to reach services above the ceiling without dismantling the entire surface. Moisture conditions should be considered carefully in basement installations. If the area has high humidity or a history of leaks, the selected tile should be appropriate for the environment. Ventilation and moisture control should also be addressed to help protect the finished ceiling. Classroom and Learning Spaces Classrooms require a combination of suitable lighting, sound control, ventilation, and practical access to services. Acoustic ceiling tiles can help reduce excessive sound reflection, which may be useful when teachers and students need to communicate clearly. Lighting fixtures can be distributed across the grid to illuminate desks, boards, displays, and activity areas. Ventilation components can also be positioned within the ceiling layout. Durability and ease of cleaning should be considered because educational spaces experience frequent daily use. Retail and Commercial Uses Retail stores and commercial interiors often require flexible ceiling systems because lighting, displays, and services can change over time. A square suspended ceiling provides a structured background while allowing individual components to be accessed or rearranged when necessary. The tile finish can be selected to complement the store’s interior. Smooth neutral tiles can create a simple backdrop, while textured or darker surfaces can contribute to a more distinctive atmosphere. Commercial applications may also require consideration of fire performance, durability, cleaning, and acoustic characteristics. Creating a Modern Interior A square ceiling does not have to look basic. Its appearance can be influenced by the tile surface, grid finish, lighting, wall colors, and surrounding materials. A simple white or neutral ceiling can create a bright and understated interior. Darker tiles can produce
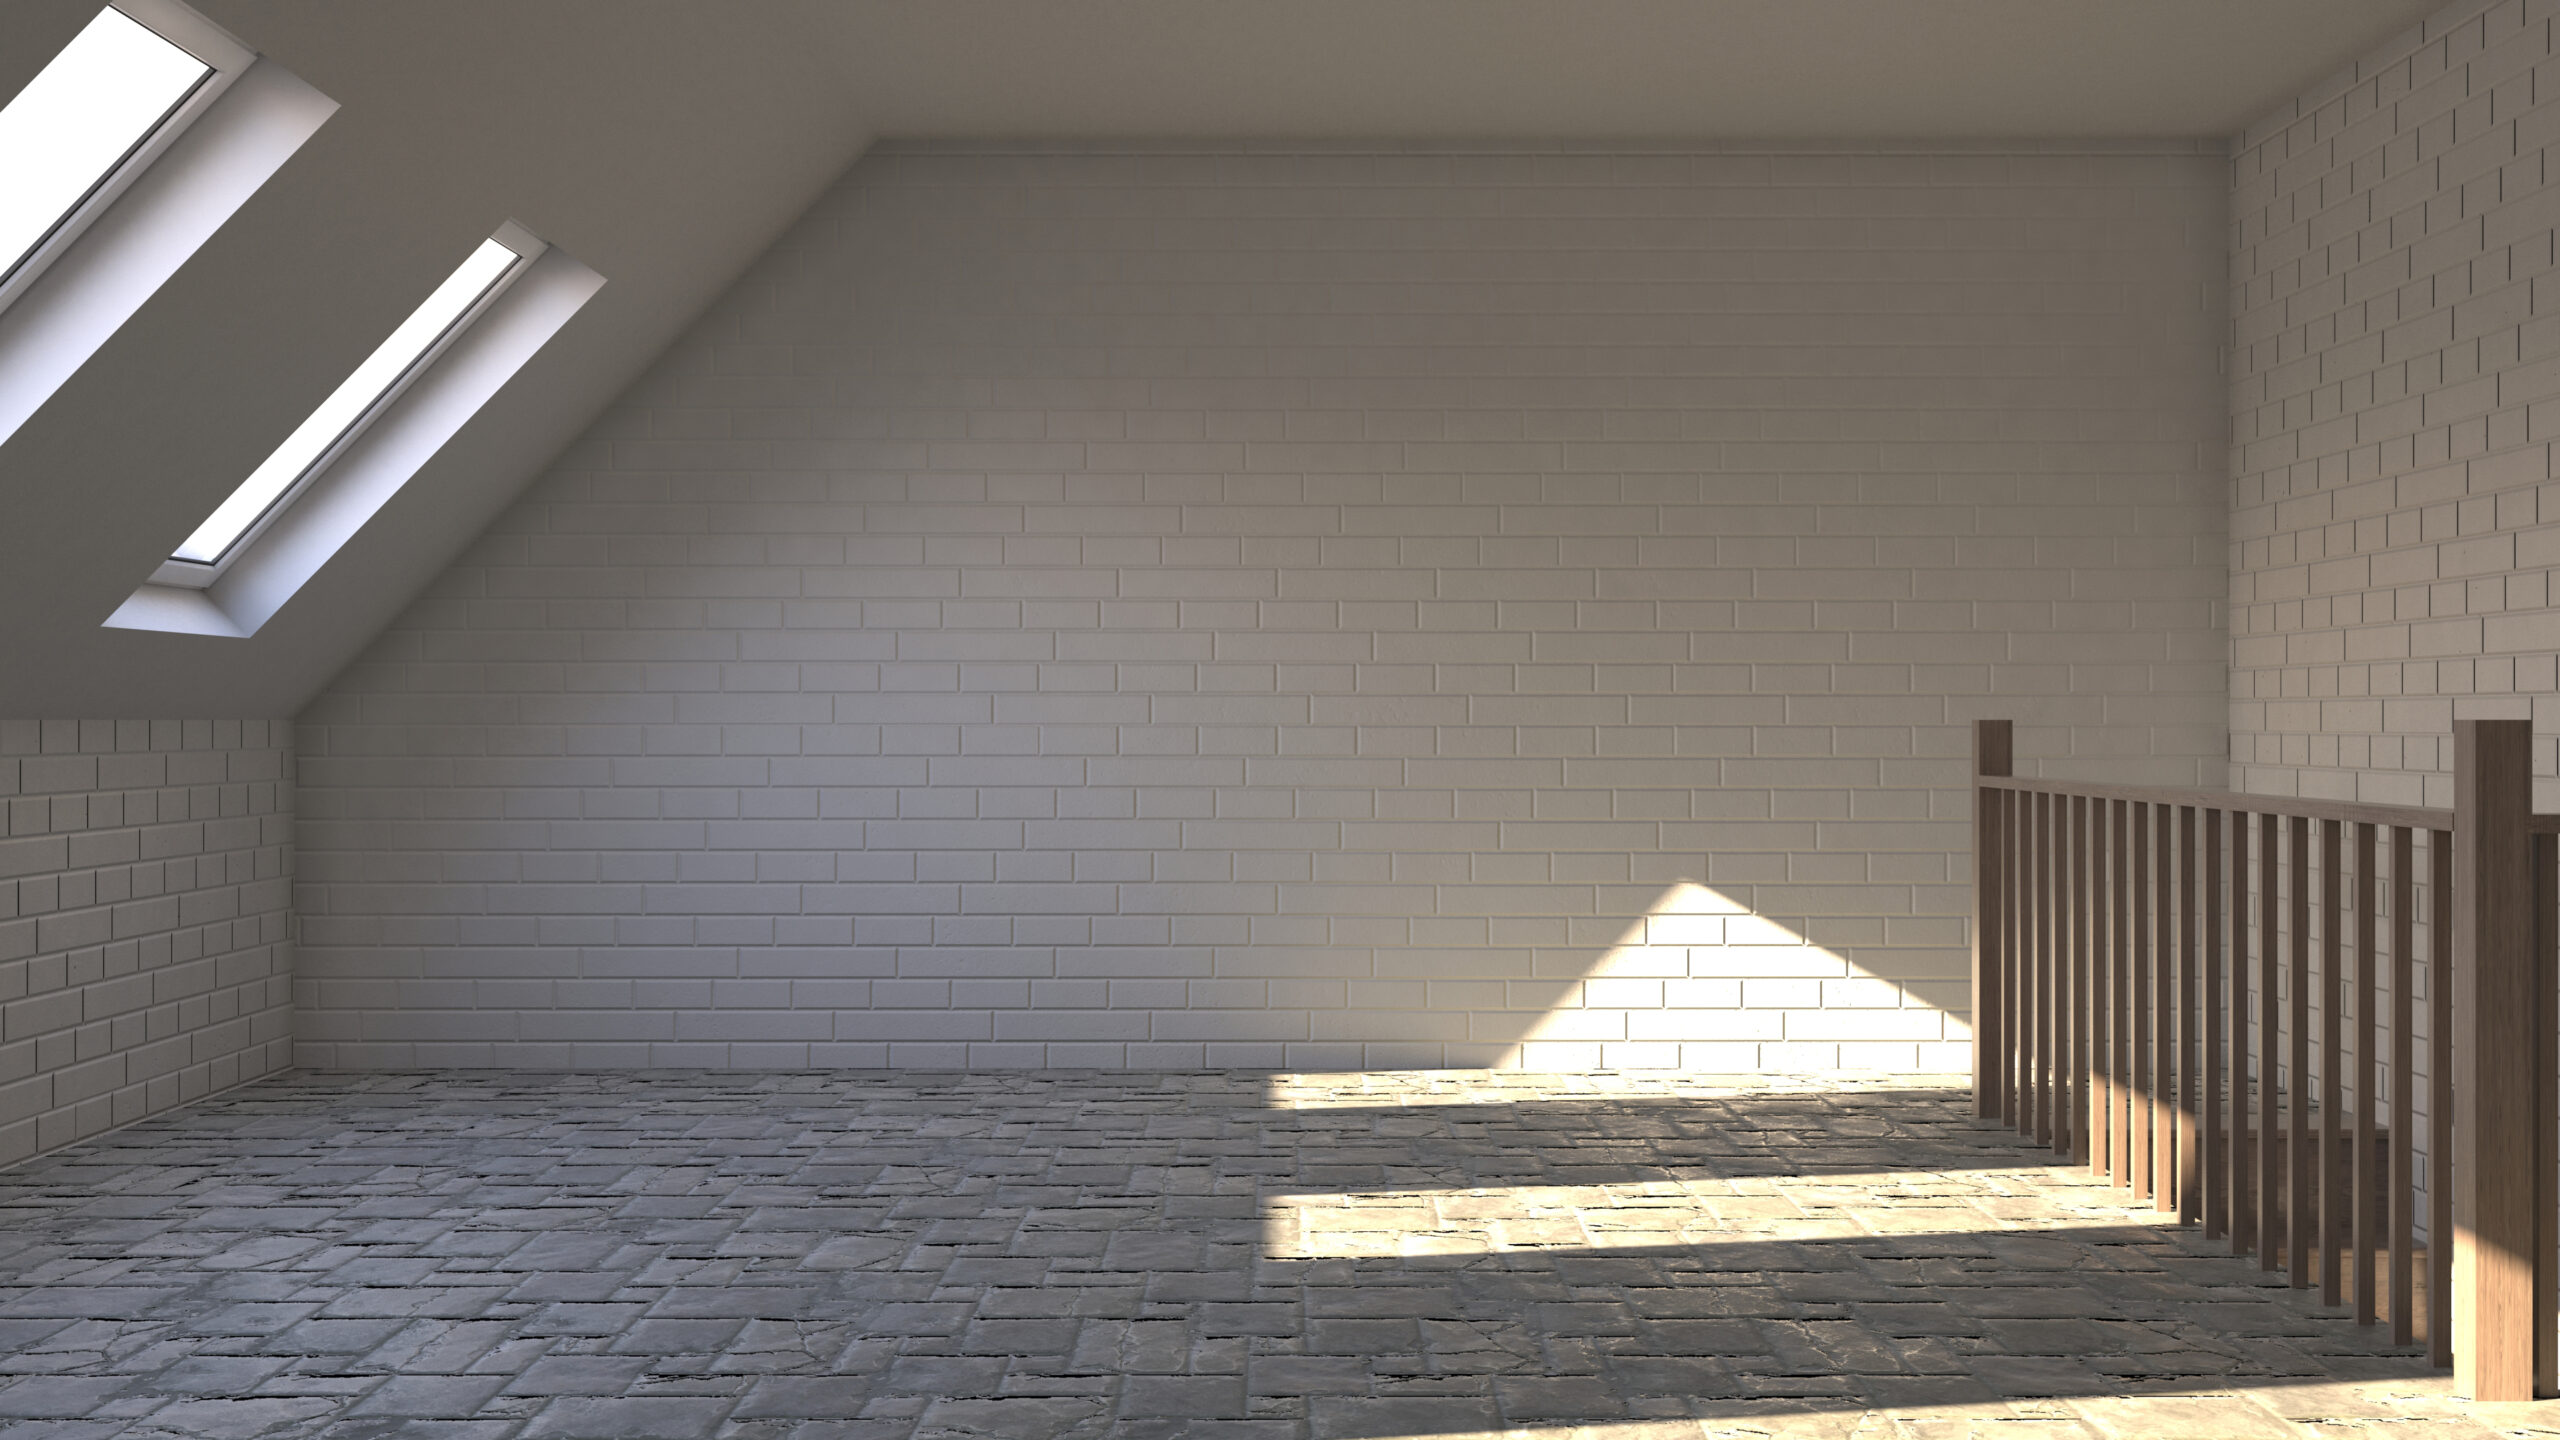
Wall Angle Ideas for Suspended Ceiling Installation
A suspended ceiling depends on several structural components to create a stable and organized finished surface. While ceiling tiles and grid runners receive most of the visual attention, the perimeter components are equally important for establishing a secure installation. wall angle is commonly used around the edges of suspended ceiling systems to create a defined boundary where the ceiling grid meets the surrounding walls. Its shape, placement, finish, and alignment can influence both the appearance and stability of the completed ceiling. Understanding how this component works can make ceiling planning easier and help create a more consistent result in offices, basements, classrooms, retail spaces, and residential interiors. What Is a Wall Angle? A wall angle is a perimeter trim component used with many suspended ceiling systems. It is typically installed around the walls of a room to provide a supporting edge for the ceiling grid and tiles. The component generally has an L-shaped profile, with one section attached to the wall and another extending horizontally to support the edge of the ceiling system. Although it may appear simple, accurate installation is important. If the perimeter trim is uneven or incorrectly positioned, the ceiling tiles may not sit properly along the edges. The material and finish can vary depending on the ceiling system. Common options include metal profiles with different finishes designed to coordinate with the grid and ceiling tiles. Why the Perimeter Matters The perimeter of a suspended ceiling establishes the boundary of the entire grid system. It needs to follow the room’s walls consistently so that the interior grid can be aligned correctly. A poorly planned perimeter can create uneven edge spaces and make the ceiling appear unbalanced. In contrast, a carefully measured perimeter provides a reliable reference for the rest of the installation. The wall condition should also be evaluated before installation. Uneven surfaces, corners, columns, and other architectural details may affect how the perimeter trim is positioned. Planning these details before installing the main grid can reduce adjustments later. Choosing the Right Material Perimeter trim is available in different materials and finishes. Metal is widely used because it can provide strength and a consistent appearance with the ceiling grid. The selected material should be compatible with the rest of the suspended ceiling system. Mixing components without checking compatibility can affect fit and appearance. The finish is another consideration. White or neutral finishes can blend with conventional ceiling tiles, while darker finishes may be suitable for contemporary or industrial interiors. In some designs, the perimeter can be used as a subtle contrast element. The choice should complement the room rather than distract from the ceiling pattern. Measuring the Room Accurate measurements are essential before installing the perimeter. The room should be measured along each wall rather than assuming that opposite walls are perfectly equal. Older buildings and remodeled rooms can contain slight variations in wall dimensions. Taking multiple measurements can help identify these differences before materials are cut. The intended ceiling height should also be established carefully. It needs to provide adequate space for the ceiling system, lighting, ventilation, wiring, and other services that may occupy the area above the finished surface. A level reference line is particularly important. The perimeter should follow a consistent elevation around the room so the finished ceiling remains visually straight. Creating a Level Installation A suspended ceiling should appear level across the entire room. The perimeter trim provides an important reference for achieving this result. A laser level or another appropriate leveling method can help establish a consistent installation line. The reference should be checked at several points around the room. Walls are not always perfectly level or straight, so the installer may need to account for variations while maintaining the intended ceiling plane. Taking time to establish the correct height before attaching the perimeter components can prevent problems when the main grid and tiles are installed. Working Around Corners Corners require careful attention because the perimeter pieces need to meet cleanly. Inside and outside corners may require different cutting and joining techniques depending on the product. Accurate cuts can create a more finished appearance. Uneven joints or unnecessary gaps can become noticeable, particularly when the ceiling has strong lighting or contrasting trim. The corner treatment should also allow the ceiling tiles to fit correctly without excessive pressure or awkward cuts. Planning the corner details before installation can help maintain a consistent perimeter around the entire room. Coordinating With Ceiling Tiles The perimeter trim and ceiling tiles should be considered as part of one system. The edge tiles may need to be cut to fit the room dimensions, especially when the room is not an exact multiple of the tile size. The goal is usually to avoid extremely narrow pieces along one side of the room. Centering the grid can create more balanced edge sections. The perimeter position can therefore influence the overall tile layout. Before installing the trim, it can be helpful to determine where the grid and tile joints will fall. This approach can improve the visual balance of the finished ceiling. Integrating Lighting and Services Suspended ceilings often contain lighting fixtures, ventilation components, speakers, sprinklers, and electrical services. These elements need to be considered when establishing the ceiling height and grid layout. The perimeter should be installed at a height that provides sufficient room for the planned services. If ducts or electrical equipment require more space than expected, the ceiling height may need to be reconsidered before installation. Lighting should also be positioned in relation to the grid rather than treated as a separate part of the project. A coordinated plan can reduce the need to move components after the ceiling is installed. Using Perimeter Trim in Basements Basements are common locations for suspended ceilings because they often contain exposed plumbing, electrical wiring, and HVAC components. A perimeter trim can help create a finished boundary around the room while leaving access to the space above the ceiling. Basement walls may be constructed from concrete, masonry, drywall, or other

Painting a Basement Ceiling Black for a Modern Look
A basement ceiling can become an important part of the room’s overall design, especially when pipes, ducts, wiring, and structural elements are visible overhead. Instead of covering everything with a conventional ceiling, some homeowners prefer to create a more open appearance by using a dark finish. painting basement ceiling black can visually unify exposed components while giving the space a contemporary or industrial character. This approach can work particularly well in entertainment rooms, home gyms, workshops, offices, and finished basements. However, the result depends on proper preparation, suitable paint, lighting, ventilation, and careful attention to the condition of the ceiling and exposed building services. Why Use a Black Ceiling in a Basement A dark ceiling can create a distinctive atmosphere without requiring a suspended ceiling system. When the ceiling contains exposed pipes, ductwork, cables, beams, and other elements, a consistent dark color can visually blend these components together. This approach can also make the basement feel more intentional. Instead of treating visible mechanical elements as something that must always be hidden, they can become part of the room’s design. A black ceiling may also work well with contemporary furniture, concrete-inspired flooring, wood accents, metal finishes, and warm lighting. The contrast between the dark overhead surface and lighter walls can help establish a balanced visual composition. Inspecting the Basement Before Painting Preparation is one of the most important parts of the project. Before applying any paint, inspect the entire ceiling area carefully. Look for water stains, active leaks, mold, excessive moisture, damaged pipes, loose wiring, rust, or deteriorating surfaces. Painting over an unresolved moisture problem can hide evidence of damage and may lead to further deterioration. The basement should also have suitable ventilation. If the space is regularly humid, the underlying moisture issue should be addressed before decorative work begins. Any electrical, plumbing, or HVAC concerns should also be evaluated before painting. Components that should remain accessible should not be permanently obstructed by paint or other finishes. Preparing Exposed Ceiling Components Basement ceilings can contain many different materials. Wood, metal, plastic, concrete, and previously painted surfaces may all appear in the same area. These materials may require different preparation methods. Dust and loose debris should be removed so the paint can adhere properly. Metal surfaces may require rust treatment or an appropriate primer, while previously painted surfaces should be checked for peeling or flaking. Surfaces with grease, dirt, or residue may require suitable cleaning before painting. Any loose material should be removed carefully. Preparation is especially important when the ceiling includes old or uneven surfaces because dark paint can make some imperfections more noticeable under strong lighting. Selecting the Right Paint The paint should match the basement environment and the materials being coated. A suitable interior paint designed for the intended surface is generally preferable to using one product without considering the substrate. A matte or low-sheen finish is often considered for ceilings because it can reduce visible reflections and help create a uniform appearance. Higher-sheen finishes may reflect more light and can make surface imperfections more noticeable. The basement’s moisture conditions should also be considered. If the room experiences persistent humidity, resolving the environmental problem should come before relying on paint to protect the ceiling. Primer can also be useful where surfaces are porous, stained, bare, or made from materials that require additional adhesion. Choosing Between Matte and Satin Finishes The sheen of the paint can significantly influence the finished appearance. Matte finishes tend to absorb more light and can create a softer, less reflective ceiling. This can be useful when the goal is to make pipes, ducts, and other overhead components visually recede. Satin or slightly higher-sheen finishes can reflect more light and may be easier to clean in certain applications. However, reflections can highlight uneven surfaces and mechanical components. The best finish depends on the room’s lighting, ceiling condition, cleaning requirements, and desired appearance. Testing a small area first can help determine how the selected product looks under the basement’s actual lighting. Preparing the Room Painting an exposed basement ceiling can be more complicated than painting a conventional flat ceiling because there may be many surfaces overhead. Furniture and equipment should be removed or covered. Floors should also be protected with appropriate coverings. Walls, windows, lighting fixtures, vents, and other areas that should remain unpainted need suitable protection. Because paint can travel through small openings and around exposed components, careful preparation can reduce unwanted overspray or splatter. Adequate ventilation is also important. Doors, windows, fans, or other appropriate ventilation methods can help improve air circulation, provided they are suitable for the space and the paint product being used. Working Around Pipes and Ducts Pipes and HVAC ducts often make up a large portion of an unfinished basement ceiling. Painting them the same dark color as surrounding surfaces can create a more unified appearance. However, not every component should automatically be painted. Certain labels, identification markings, valves, access points, and service components may need to remain visible. Mechanical equipment should also be treated according to the manufacturer’s recommendations. Heat-producing equipment and components requiring regular inspection should not be obstructed or improperly coated. Planning the painting sequence can make it easier to cover the ceiling consistently while keeping important service areas accessible. Lighting Considerations Lighting can dramatically affect the appearance of a black basement ceiling. A dark surface absorbs more visual light than a white ceiling, so the room may require thoughtful lighting placement. Recessed fixtures, track lighting, wall-mounted fixtures, and pendant lights can all contribute to the final atmosphere. The placement should correspond to how the basement will be used. A home theater may benefit from controlled lighting, while a workshop or home office generally requires stronger task illumination. Light-colored walls and furniture can also help balance the dark ceiling. Warm lighting can create a comfortable atmosphere, while cooler lighting may produce a more contemporary appearance. Making a Basement Feel More Spacious A black ceiling does not automatically make a basement feel smaller. The perceived size of the
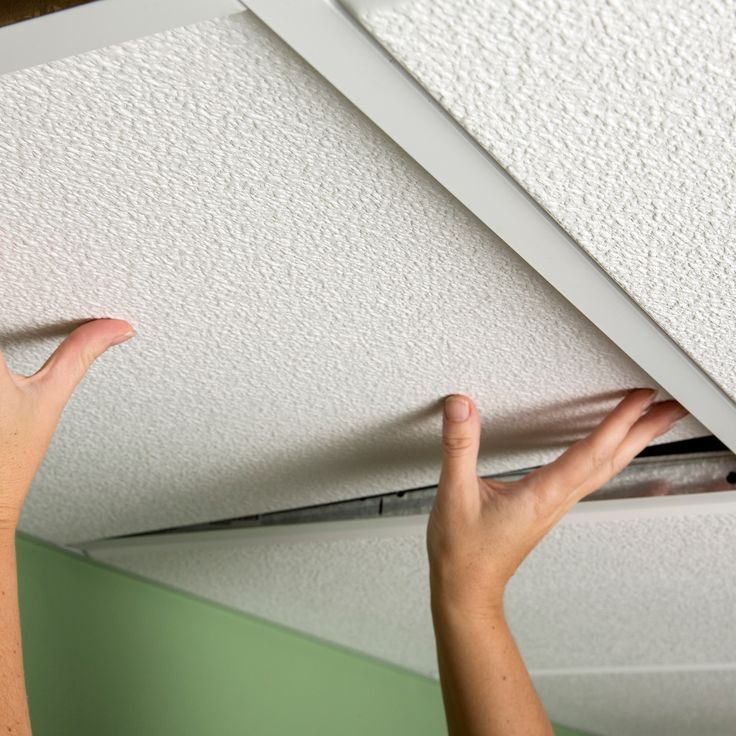
2 x 2 Drop Ceiling Tile Ideas for Modern Interiors
Ceiling design can influence the appearance, lighting, acoustics, and practical function of an interior space. Suspended ceiling systems are widely used because they provide a structured surface while leaving accessible space above the ceiling for electrical wiring, ventilation, lighting, and other building services. A 2 x 2 drop ceiling tile offers a practical square format that can create an organized and balanced ceiling pattern. These tiles can be used in offices, classrooms, basements, retail spaces, studios, and selected residential rooms. The right material, finish, lighting arrangement, and grid layout can help create a ceiling that supports both everyday use and the overall interior design. Understanding the Square Ceiling Format Square ceiling tiles create a consistent visual rhythm across a room. The repeated pattern can make a ceiling appear organized while providing convenient sections that can be accessed individually when required. The 2 x 2 format is particularly useful in suspended ceiling systems because the square dimensions can work naturally with standard grid arrangements. Lighting fixtures, air vents, speakers, and other ceiling components can often be coordinated with the grid pattern. Before selecting tiles, it is important to consider the room’s dimensions and the position of existing services. A well-planned layout can reduce unnecessary cutting and help maintain a consistent appearance across the ceiling. Selecting the Right Ceiling Material Ceiling tiles are available in several materials, each offering different visual and functional characteristics. Mineral fiber products are often selected for spaces where acoustic performance is important. Metal tiles can provide a more contemporary appearance and may be suitable for specific commercial environments. PVC and other synthetic options can be useful where moisture resistance is a priority, depending on the product specifications. Decorative products may include textured surfaces, patterns, or subtle designs that add visual interest. The material should be selected according to the room’s conditions rather than appearance alone. Moisture exposure, acoustic needs, cleaning requirements, fire performance, and durability can all affect which product is appropriate. Creating a Balanced Grid Layout The grid is the framework that holds suspended ceiling tiles in position. Because the grid remains an important visual element, its arrangement should be considered before installation. A symmetrical layout can create a clean and orderly appearance. In rooms with unusual dimensions, the placement of partial tiles around the edges can affect how balanced the finished ceiling looks. It is often useful to plan the center of the ceiling first and work outward. This can help prevent very narrow tile sections along one side of the room. The location of doors, windows, partitions, and major furniture should also be considered when planning the grid. Integrating Lighting Lighting should be planned alongside the ceiling layout rather than added afterward. Square ceiling tiles provide natural locations for recessed or modular lighting fixtures that can align with the grid. Even lighting can be useful in offices, classrooms, kitchens, and other functional spaces. Decorative fixtures can create a stronger visual focal point in reception areas, dining spaces, or entertainment rooms. LED lighting is another option for suspended ceilings. Different color temperatures can create different atmospheres, while dimmable fixtures can provide flexibility where appropriate. The number and position of fixtures should be based on the room’s size, purpose, natural light, and required illumination level. Supporting Better Acoustics Ceiling surfaces can influence how sound travels through an interior. In offices, classrooms, conference rooms, and shared spaces, acoustic performance can be an important part of ceiling selection. Some suspended ceiling tiles are manufactured with sound absorption properties. Textured and perforated surfaces may also contribute to acoustic performance, depending on their construction. A ceiling system should be considered together with walls, flooring, furniture, and other surfaces because sound behavior is affected by the entire room. For rooms where conversations, presentations, or collaborative activities take place, selecting a product with appropriate acoustic characteristics can contribute to a more comfortable environment. Using Drop Ceiling Tiles in Offices Offices are one of the common environments where suspended ceiling systems can provide practical advantages. The space above the ceiling can accommodate wiring, ventilation, data connections, and other services. A square tile layout can also create a consistent visual pattern across open work areas. Lighting fixtures can be arranged according to desk locations, meeting spaces, corridors, and other functional zones. Acoustic tiles may be useful in open-plan offices where reducing sound reflection is an important consideration. The ceiling can also be coordinated with partitions, furniture, flooring, and wall finishes to create a unified workplace appearance. Creating a Practical Basement Ceiling Basements often require convenient access to plumbing, electrical systems, ductwork, and other components. A suspended ceiling can provide access without permanently covering these services. Square ceiling tiles can create a finished appearance while allowing individual sections to be removed when access is required. This can be particularly useful in utility areas or finished basement rooms. Moisture conditions should be evaluated before selecting the tile material. If the basement has a history of humidity or moisture exposure, a product designed for the specific environment may be more suitable. Adequate ventilation and moisture management should also be addressed as part of the overall basement design. Ceiling Ideas for Classrooms Classrooms benefit from ceilings that support visibility, acoustics, lighting, and practical service access. A suspended system can help organize these elements within a consistent grid. Acoustic ceiling tiles can be particularly useful because they may reduce excessive sound reflection. Proper lighting can help students and teachers see work surfaces, presentation areas, and displays comfortably. Ventilation fixtures can also be incorporated into the ceiling plan. When all components are coordinated with the grid, the finished ceiling can appear more organized and visually balanced. The tile finish should also be selected with the classroom’s cleaning and durability requirements in mind. Improving Retail and Commercial Spaces Retail environments often require flexible ceiling systems because lighting, displays, signs, and other fixtures may change as the space evolves. A suspended ceiling allows lighting components and other services to be coordinated within a structured grid. The square tile pattern can provide
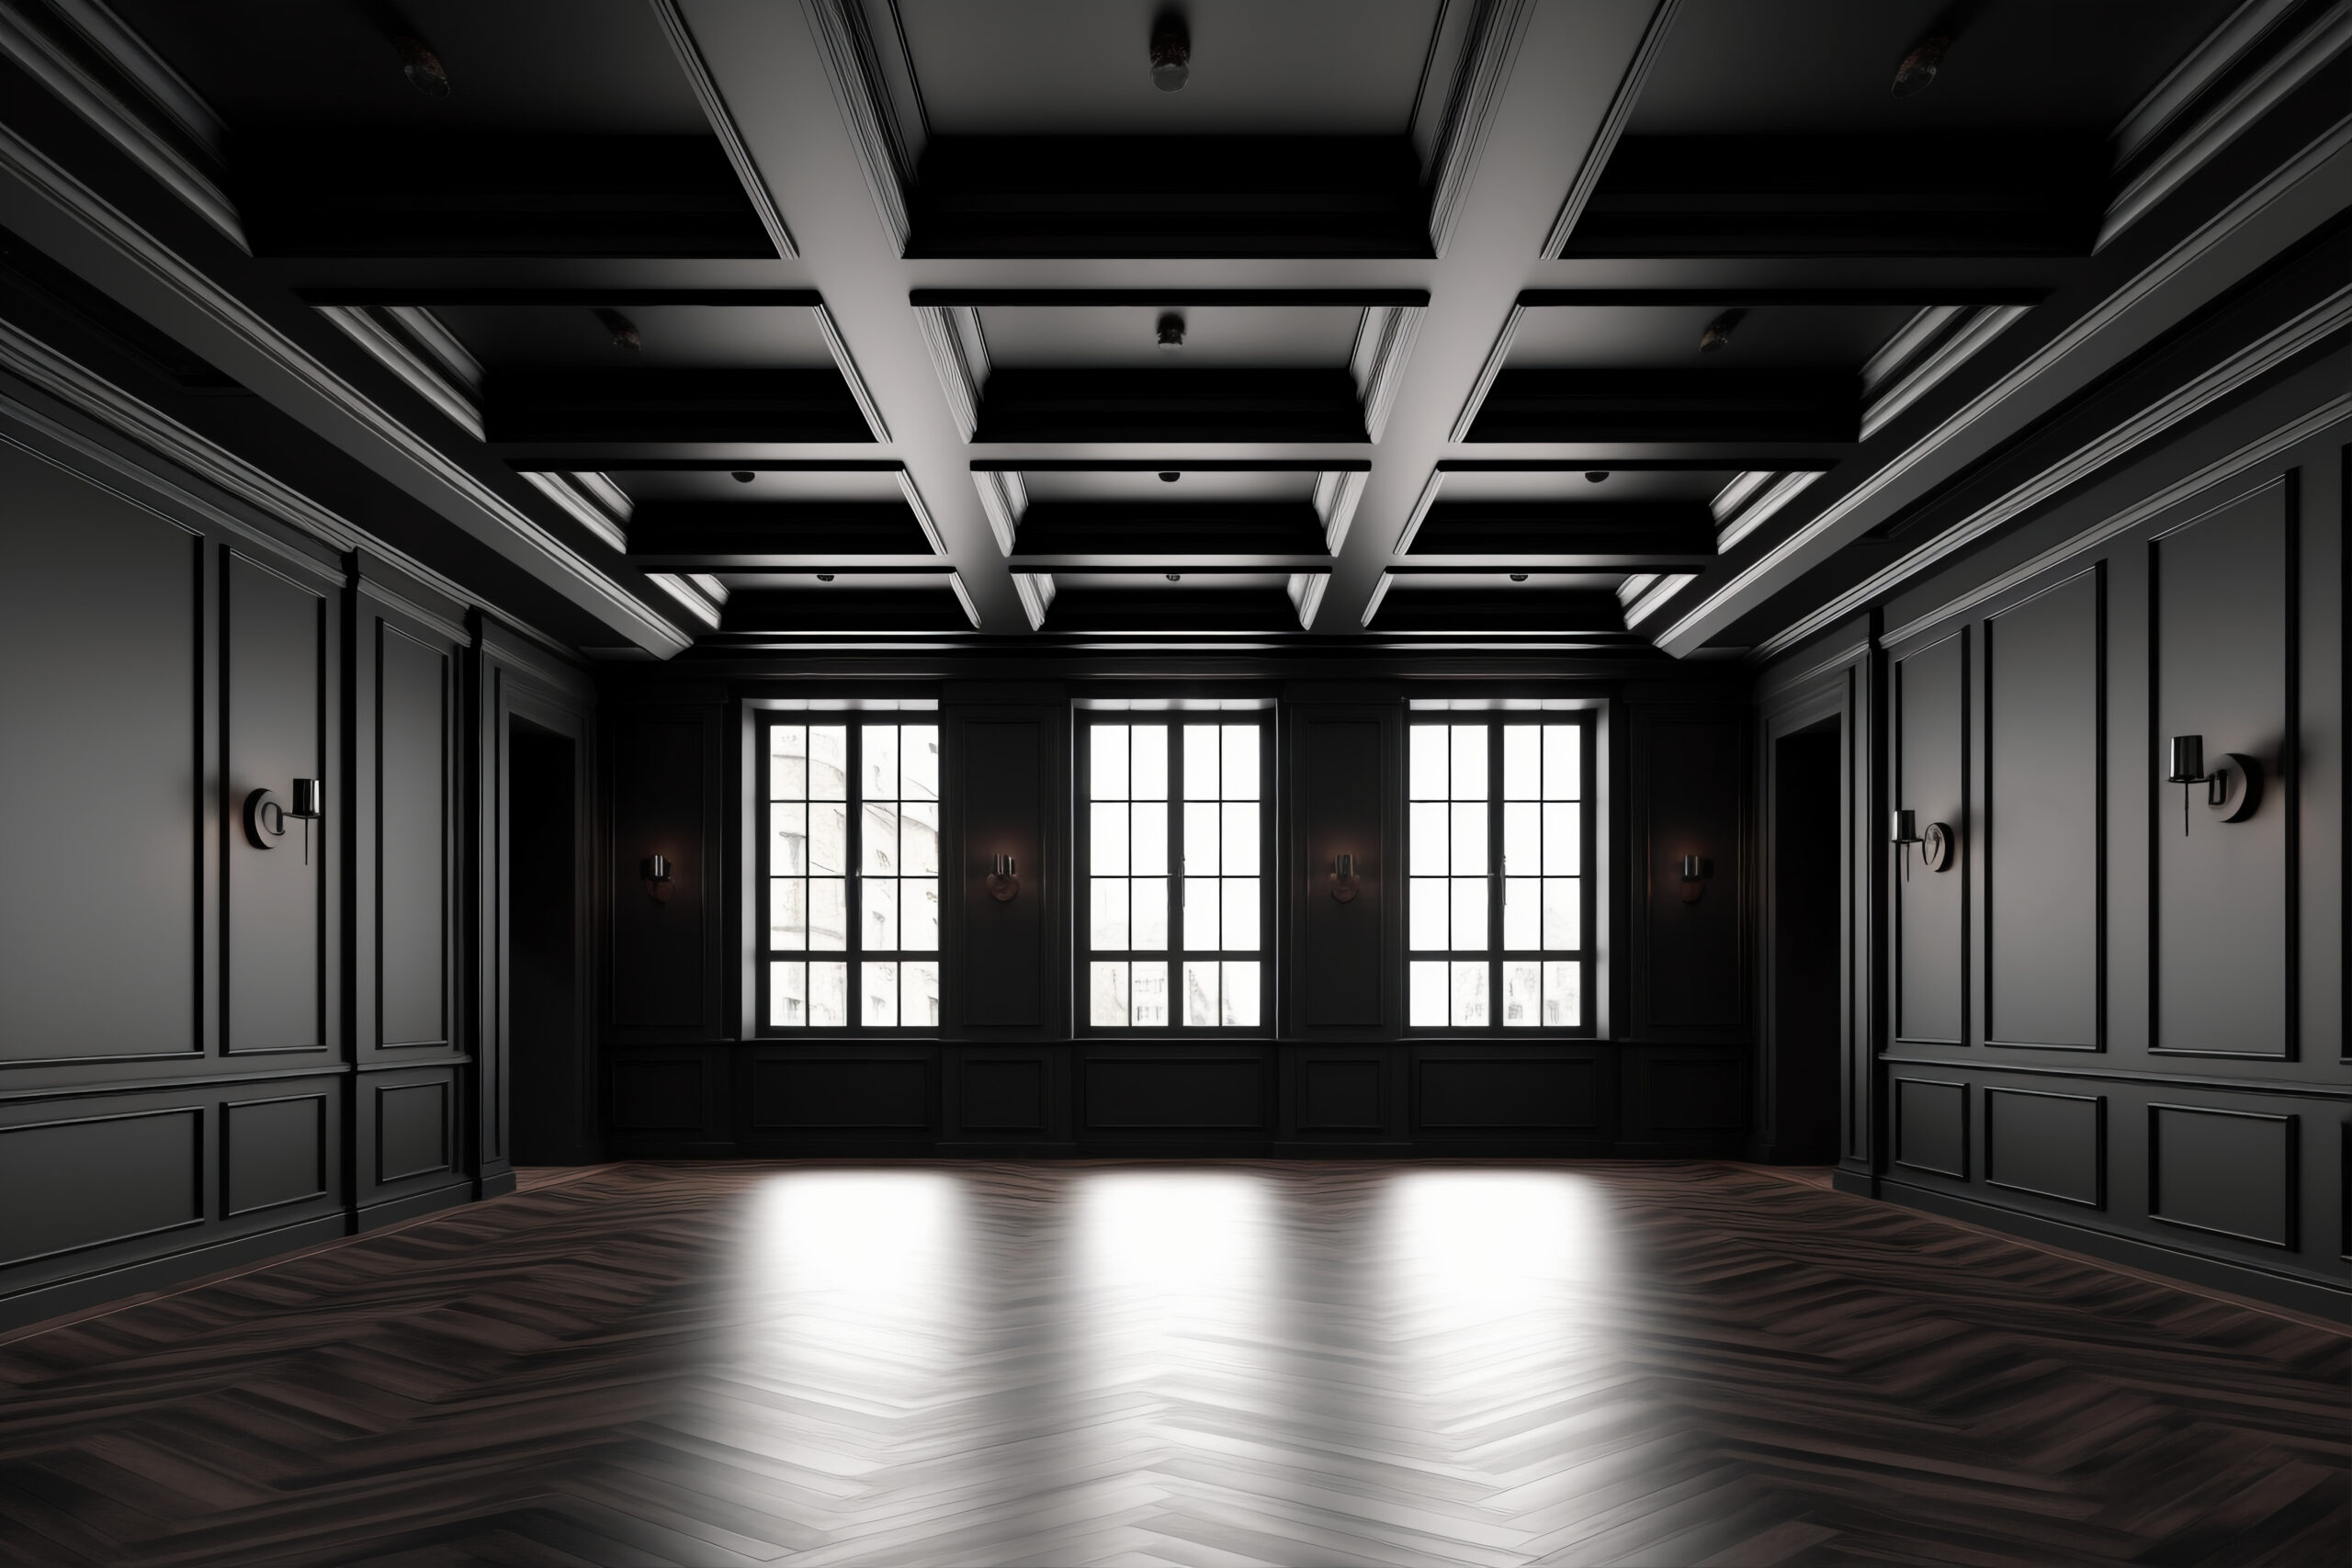
Black Suspended Ceiling Tile Ideas for Modern Interiors
A ceiling can strongly influence the atmosphere, proportions, and visual character of an interior. While light ceiling finishes are common, darker surfaces can create a more dramatic and contemporary appearance. black suspended ceiling tiles can add depth to a room while working with a suspended grid system that provides practical access to wiring, lighting, ventilation, and other services above the ceiling. This type of ceiling can suit offices, entertainment spaces, retail interiors, studios, restaurants, and selected residential areas. With the right lighting, room proportions, tile pattern, and surrounding finishes, a dark ceiling can become an intentional design feature rather than simply a functional surface. Creating a Modern Ceiling Appearance Dark ceiling surfaces can change how a room feels. They often create a stronger visual contrast with walls, furniture, flooring, and lighting fixtures. This makes them useful when the goal is to establish a modern or industrial-inspired interior. A suspended ceiling also creates a structured appearance because the tiles are installed within a visible or concealed grid. The grid layout can be coordinated with lighting fixtures and other ceiling-mounted elements. Instead of treating the ceiling as an afterthought, homeowners and designers can use the arrangement to create a balanced overall composition. In larger rooms, a dark ceiling can add visual definition to an otherwise open space. In commercial environments, it may also help establish a particular atmosphere without requiring major architectural changes. Selecting the Right Tile Finish Not every black ceiling tile has the same appearance. Some products have a smooth surface, while others include subtle textures, perforations, patterns, or acoustic finishes. The choice should reflect both the design goals and functional requirements of the room. A smooth surface can create a simple and contemporary appearance. Textured tiles may provide additional visual interest and can help reduce the uniform look of a large ceiling. Perforated options are often considered where acoustic performance is important. The amount of light in the room should also influence the selection. A very dark matte surface absorbs more visual attention and can make a ceiling feel deeper. A slightly reflective finish can interact differently with artificial lighting and may create a more noticeable visual effect. Coordinating the Ceiling Grid The grid is an important part of a suspended ceiling because it supports the tiles and establishes the overall pattern. With a dark ceiling, the grid can either blend into the surface or provide visible definition. A matching dark grid can produce a continuous appearance where individual tiles and framing elements appear visually connected. This approach is often suitable for contemporary interiors and spaces influenced by industrial design. A contrasting grid can make the ceiling pattern more noticeable. This can be useful in rooms where geometric organization is an important part of the design. The spacing and alignment of the grid should remain consistent so that lighting fixtures, vents, speakers, and other components appear properly integrated. Using Lighting With a Dark Ceiling Lighting plays a particularly important role when using a dark ceiling. Since dark surfaces can absorb more light visually, the room may require careful placement of artificial illumination. Recessed fixtures can provide a clean appearance while distributing light across work areas. Linear lighting can emphasize the geometry of the ceiling and create a contemporary look. Pendant fixtures can provide decorative interest, particularly in dining areas, reception spaces, restaurants, and other social environments. The position of lighting should also be coordinated with furniture and room functions. A workspace may need stronger task lighting, while a lounge or entertainment area may benefit from softer illumination. Indirect lighting can also be used around selected ceiling details. When light is directed toward walls or architectural features, it can balance the darker overhead surface and create greater depth. Making a Small Room Feel Balanced Dark ceilings are sometimes avoided in smaller rooms because they can appear visually heavy. However, the result depends on the complete design rather than the ceiling color alone. A small room can remain balanced when the walls, flooring, lighting, and furniture provide enough contrast. Light-colored walls can help offset a dark ceiling. Bright task lighting can also prevent the room from feeling excessively enclosed. Another approach is to use dark ceiling tiles in selected areas rather than across an entire space. A darker ceiling zone can define a seating area, reception counter, kitchen island, or workspace without visually dominating the entire room. Room height also matters. Higher ceilings generally provide more flexibility for darker finishes because there is greater vertical space between the ceiling and occupants. Creating an Industrial Interior Black ceiling systems are frequently associated with industrial-inspired interiors because they can complement exposed mechanical and structural elements. When ducts, pipes, conduits, or lighting systems remain visible above the ceiling plane, a dark overhead finish can help create a cohesive visual environment. The industrial style does not require every surface to be dark. Wood, concrete-inspired flooring, metal furniture, glass partitions, and warm lighting can provide contrast. In offices, studios, restaurants, and creative workspaces, this combination can create a visually distinctive atmosphere while maintaining the practical benefits of a suspended ceiling. Improving Acoustic Comfort Ceiling tiles can serve more than a decorative purpose. Certain suspended ceiling products are designed to help manage sound within a room. Acoustic performance can be especially useful in offices, classrooms, conference rooms, entertainment areas, and commercial environments where multiple conversations occur at the same time. Tile construction, surface texture, density, and perforation can influence how sound behaves. When selecting a ceiling system, acoustic requirements should therefore be considered alongside appearance. A visually attractive tile may not provide the same acoustic characteristics as a product specifically designed for sound absorption. The room’s walls, flooring, furniture, and other surfaces also influence overall acoustics. A complete approach can help create a more comfortable sound environment. Planning Around Ventilation and Services One of the practical advantages of suspended ceilings is the accessible space created above the finished ceiling. Electrical wiring, ventilation components, data cables, and other building services can often be organized within this area.

Dome Pendant Light: A Complete Guide to Styles, Sizes, Placement, and Buying Tips
A dome pendant light is a stylish and practical lighting fixture that can instantly improve the look and functionality of a room. With its curved, bowl-shaped shade, this type of pendant directs light downward while creating a strong visual focal point. Dome pendants are especially popular above kitchen islands, dining tables, breakfast counters, desks, entryways, and other areas where focused illumination is useful. Today, dome pendant lights are available in many materials, colors, sizes, and design styles. You can find minimalist white fixtures, industrial black metal shades, elegant brass designs, woven rattan pendants, glass domes, and sculptural designer options. Retailers currently offer dome pendant fixtures ranging from compact lights for small spaces to oversized statement pieces for large kitchens and dining rooms. Whether you are remodeling your home or simply replacing an outdated ceiling fixture, understanding how dome pendant lighting works can help you choose the right design. What Is a Dome Pendant Light? A dome pendant light is a hanging ceiling fixture featuring a rounded or bowl-shaped shade. The fixture is suspended from the ceiling using a cord, chain, rod, or adjustable suspension system. Unlike globe-shaped pendant lights, which distribute light in multiple directions, a traditional dome shade generally directs more illumination downward. This makes the design particularly useful for areas where you want concentrated light over a particular surface. The curved shape also gives the fixture a decorative quality. Depending on the material and finish, a dome pendant can look modern, farmhouse-inspired, industrial, Scandinavian, vintage, or contemporary. Many current lighting collections specifically categorize dome pendants by diameter, finish, material, light source, and style, making it easier to find a fixture suited to a particular room. Why Choose a Dome Pendant Light? There are several reasons homeowners and interior designers use dome pendant lighting. 1. Focused Downward Lighting One of the biggest advantages is the direction of the light. The dome shade helps concentrate illumination below the fixture. This can make a dome pendant particularly useful over: The shape can help reduce direct glare from the bulb while directing light toward the area where it is needed. 2. Strong Decorative Appeal A pendant light does more than illuminate a room. It can become part of the room’s overall design. A large black dome can create an industrial appearance, while a white dome can give a room a cleaner and lighter feeling. Brass and bronze finishes can introduce warmth, while woven materials can add natural texture. 3. Works With Many Interior Styles Dome pendant lights are remarkably versatile. They can complement: The same basic shape can therefore work in very different homes simply by changing the material, finish, size, and suspension style. Popular Dome Pendant Light Styles Choosing the right style is easier when you understand the most common options. Black Dome Pendant Light Black dome pendants are a popular choice for modern and industrial interiors. A matte black finish can create contrast against white cabinets, light wood, marble, or neutral walls. Black fixtures can also coordinate easily with black cabinet hardware, faucets, window frames, or furniture. White Dome Pendant Light White dome lighting is ideal for bright, clean interiors. It can blend into a light-colored ceiling or provide a subtle contrast against darker surroundings. White metal and ceramic-style designs are particularly suitable for minimalist, Scandinavian, and modern kitchens. Brass Dome Pendant Light Brass introduces warmth and a more decorative appearance. Depending on the finish, it can work in contemporary, transitional, vintage, or traditional interiors. Brushed brass tends to appear softer than highly polished brass, while antique finishes can create a more traditional appearance. Glass Dome Pendant Light Glass dome pendants can create a lighter visual effect than solid metal shades. Clear glass allows the bulb to remain visible, while frosted or opaque glass can provide a softer appearance. When selecting glass, consider whether you want the bulb itself to be part of the design. Woven or Natural Dome Pendant Rattan, wicker, bamboo, and other natural materials can introduce texture and warmth. These fixtures are particularly useful in coastal, boho, farmhouse, and Japandi-inspired spaces. Natural-texture dome designs have also remained a notable lighting trend in recent design guides. Best Places to Use a Dome Pendant Light A dome pendant can be used throughout the home, but some locations are especially suitable. Kitchen Island The kitchen island is one of the most popular locations. A dome pendant can provide focused light over food-preparation and seating areas while also creating a visual centerpiece. For a larger island, homeowners may use two or three smaller pendants rather than one oversized fixture. Dining Room A dome pendant above a dining table can help define the dining zone and create a comfortable atmosphere. The fixture should be appropriately scaled to the table so that it feels intentional rather than oversized or lost within the room. Bedroom A smaller dome pendant can be used beside a bed, especially where you want to replace a traditional table lamp. It can also work above a small reading chair or occasional table. Home Office A dome pendant above a desk can provide focused overhead lighting. However, it should be positioned carefully to avoid reflections on monitors and excessive glare. Entryway An entryway pendant can provide both practical illumination and a strong first impression. Large dome fixtures can work particularly well in rooms with higher ceilings. How to Choose the Right Size Size is one of the most important factors when buying a dome pendant light. A fixture that is too small can disappear visually, while one that is too large can overwhelm a table or island. A useful starting point is to consider the dimensions of the furniture underneath the pendant. Some lighting guides recommend selecting a pendant diameter that represents roughly one-third to one-half of the width of a dining table, depending on the room and fixture design. For kitchen islands, the fixture should also leave enough usable space around multiple pendants if more than one light is being installed. Single Pendant vs. Multiple Pendants A single

Townhouse Blueprints: Complete Guide to Designing the Perfect Townhome
Townhouse blueprints are detailed plans that show how a townhouse is organized, built, and connected from room to room. They help homeowners, builders, architects, and developers understand the layout, dimensions, structural elements, and overall flow of a townhouse before construction begins. Townhouses are popular because they can provide many of the features of a traditional home while making efficient use of land. A well-designed blueprint can combine comfortable bedrooms, open living areas, functional kitchens, bathrooms, storage, garages, balconies, patios, and outdoor spaces within a relatively narrow footprint. Whether you are planning a new townhouse, comparing existing designs, or looking for ideas for a future home, understanding townhouse blueprints can make the planning process much easier. What Are Townhouse Blueprints? Townhouse blueprints are architectural drawings used to communicate the design and construction details of a townhouse. A blueprint can show the overall floor plan, room dimensions, doors and windows, stair locations, plumbing areas, electrical layouts, and structural components. Modern blueprints are usually created using computer-aided design software rather than traditional paper drafting methods. Depending on the project, a complete set of plans may contain several different drawings. Common townhouse blueprint drawings include: The exact documents required depend on local building regulations, the complexity of the project, and whether the townhouse is being built as an individual home or as part of a larger development. Why Townhouse Blueprints Are Important A townhouse blueprint does much more than show where the rooms are located. It helps coordinate the entire building before construction starts. Better Space Planning Because townhouses are often built on relatively narrow lots, every square foot matters. A blueprint allows designers to organize the kitchen, living room, bedrooms, bathrooms, stairs, and storage efficiently. Easier Construction Builders can use detailed plans to understand the intended dimensions and locations of walls, doors, windows, plumbing fixtures, and other components. Improved Budget Planning A detailed plan can help estimate materials and labor. Changes made on paper are generally easier and less expensive to handle than changes made after construction begins. Code and Permit Requirements Many locations require professionally prepared plans for permitting. The drawings help building officials evaluate whether a proposed project meets applicable requirements. Popular Types of Townhouse Blueprints Townhouses can be designed in many different ways. The best layout depends on the lot, number of floors, household needs, parking requirements, and desired architectural style. Two-Story Townhouse Blueprints Two-story townhouses are among the most common designs. A typical arrangement might include: First floor Second floor Separating public and private areas between floors can make the home feel organized while maximizing the available footprint. Three-Story Townhouse Blueprints Three-story designs can provide more living space without requiring a wider lot. A possible arrangement is: Some modern designs also place a rooftop terrace or balcony above the upper level. Single-Story Townhouse Blueprints Single-story townhouses can be suitable for people who prefer to avoid stairs. They generally require more land for the same amount of living space, so they may be more challenging on narrow urban lots. A compact single-story plan might include: Understanding the Main Areas in a Townhouse Blueprint A good townhouse blueprint should create a logical connection between different parts of the home. Entryway The entry should provide a comfortable transition between the exterior and interior. Even a compact entry can include a coat closet, bench, shoe storage, or small foyer. Living Room The living room is often located toward the front or rear of the main floor. Open layouts can connect it directly to the kitchen and dining space. Kitchen Townhouse kitchens may use: For narrow homes, a galley or L-shaped kitchen can provide efficient workspace without consuming too much floor area. Dining Area The dining area can be positioned between the kitchen and living room. In smaller homes, a flexible dining area may also function as an extension of the kitchen. Bedrooms Bedrooms are commonly placed on upper floors for privacy. The primary bedroom may include a private bathroom and walk-in closet. Bathrooms Townhouse plans often include at least one bathroom on the main living level and additional bathrooms near the bedrooms. Laundry Room A laundry area can be located near the bedrooms, inside a hallway closet, or on the main floor. Compact stacked washer-and-dryer arrangements can save space. Townhouse Blueprints for Narrow Lots One of the biggest advantages of townhouse design is the ability to build vertically. For a narrow lot, designers may use: Instead of expanding outward, the design uses additional floors to provide the desired amount of living space. A narrow townhouse might be only a few rooms wide while still offering three bedrooms, multiple bathrooms, an office, a garage, and outdoor space. Garage and Parking Considerations Parking can have a major effect on a townhouse blueprint. Common options include: Front-Entry Garage The garage faces the street and connects directly to the home. This is convenient but can take up a significant portion of the front elevation. Rear-Entry Garage A garage at the back can allow the front of the townhouse to focus more on the entry and living spaces. Attached Garage An attached garage offers convenient access to the interior and can provide additional storage. Detached Parking Some townhouse developments use shared parking areas or detached garages. This arrangement can reduce the amount of space dedicated to garages within individual units. Natural Light in Townhouse Designs Narrow townhouses can sometimes have fewer exterior walls, making natural lighting an important consideration. Blueprints can incorporate: Placing windows strategically can help bring daylight deeper into the home. An open stairwell can also allow light from upper-level windows to reach lower portions of the townhouse. Outdoor Spaces in Townhouse Blueprints Even a small outdoor area can increase the usability of a townhouse. Possible features include: For narrow properties, vertical landscaping and compact patios can provide outdoor space without requiring a large yard. Storage Ideas for Townhouses Storage should be considered early in the blueprint process. Useful locations include: Under-stair space is particularly useful in multi-level townhouses. Depending on the staircase configuration, it

Narrow City Lot House Plans: Smart Designs for Small Urban Lots
Narrow city lot house plans are designed to make the most of properties where available width is limited but comfortable living space is still a priority. As urban lots become smaller and land costs increase in many areas, homeowners often need house designs that use limited space efficiently without sacrificing bedrooms, storage, natural light, or outdoor living. A narrow lot does not necessarily mean a cramped home. With thoughtful planning, a relatively narrow footprint can accommodate an attractive kitchen, spacious living area, multiple bedrooms, bathrooms, storage, parking, and even a small patio or rooftop terrace. The most successful narrow-lot homes use every part of the site strategically. Vertical construction, open-concept interiors, efficient stair placement, large front and rear openings, built-in storage, and flexible rooms can all help make a narrow home feel comfortable. Whether you are building on an urban infill lot, replacing an older property, or searching for a compact modern home, understanding how narrow city lot house plans work can help you choose a design that fits your property and lifestyle. What Are Narrow City Lot House Plans? Narrow city lot house plans are home designs created specifically for lots that have limited frontage or width. Instead of spreading the home across a wide footprint, these plans often use the available depth of the property. Some also use multiple floors to increase living space without making the building wider. A narrow city home may include: The exact dimensions considered “narrow” vary by location and development regulations. A plan that works on one urban lot may not work on another because of setbacks, easements, parking rules, lot coverage, height limits, and other requirements. Why Choose a Narrow Lot House Plan? There are several reasons a narrow home design can be practical. Efficient Use of Land A narrow footprint allows homeowners to build on properties where a conventional wide house would not fit. More Urban Location Options Smaller lots may be available in established neighborhoods close to shops, schools, workplaces, and public transportation. Vertical Living Two- and three-story layouts can provide substantial interior space without requiring a wide building footprint. Lower Exterior Footprint Depending on the design, a compact footprint can leave more room for a rear garden, patio, courtyard, or other outdoor area. Flexible Interior Planning Open living areas and multi-purpose rooms can make limited square footage work harder. Common Narrow City Lot House Plan Layouts The right configuration depends on the lot dimensions and household requirements. 1. Two-Story Narrow House A two-story layout is one of the most practical solutions for a narrow property. The first floor might include: The second floor could contain: This approach separates common and private spaces while keeping the building footprint relatively small. 2. Three-Story Narrow House A three-story design can provide even more living space on a restricted lot. For example: Ground floor: garage, entry, office, bathroom Second floor: kitchen, dining, living room, balcony Third floor: bedrooms, bathrooms, laundry A rooftop terrace may provide additional outdoor space. The trade-off is increased stair use, so the layout should carefully consider everyday movement between floors. 3. Narrow Single-Story Home Single-story narrow homes can work when the lot has sufficient depth. A possible arrangement is: Front: Entry and living area Middle: Kitchen and dining Rear: Bedrooms and bathrooms This type of layout can provide convenient single-level living but may require a longer footprint. Designing the Main Living Area The living room, dining space, and kitchen are often combined in narrow homes to create a sense of openness. An open-concept layout can eliminate unnecessary partitions and improve sightlines through the house. Living Room A narrow living room should be designed around actual furniture dimensions. Consider: Avoid filling the room with oversized furniture that restricts circulation. Dining Area A compact dining area can be positioned between the kitchen and living room. Depending on the available width, options include: Kitchen Narrow kitchens often benefit from efficient layouts. Possible options include: A galley kitchen can be particularly effective in a narrow footprint because cabinets and appliances can be organized along parallel walls. The Importance of Stair Placement Stairs can consume a significant amount of floor space in a narrow house, so their position should be considered early in the design. A staircase can be placed: Each arrangement affects room sizes and circulation differently. A central staircase can divide the floor plan efficiently, while a side stair can preserve more open floor area. The ideal solution depends on the home’s width, structure, windows, and room arrangement. Natural Light in Narrow City Homes Natural light is one of the biggest challenges in narrow homes, especially when neighboring properties are close to the side walls. Since side windows may be limited, designers often need to make better use of front and rear openings. Possible strategies include: The goal is to distribute daylight as deeply into the house as practical. A bright interior can feel substantially more spacious than a similarly sized home with limited daylight. Narrow Lot House Plans With Courtyards A courtyard can be an effective solution when a narrow home needs additional daylight and outdoor space. A small courtyard can be positioned between sections of the house or at the rear. It can provide: In urban environments where surrounding buildings may be close, a private courtyard can provide an outdoor area without requiring a large backyard. Narrow City Lot House Plans With Garage Parking can be one of the most challenging aspects of designing on a narrow urban lot. Possible options include: A tandem garage places vehicles one behind another instead of side by side. This can work on narrow lots where there is enough site depth. However, parking requirements vary by jurisdiction, so the plan must be checked against local regulations. Narrow House Plans With Three Bedrooms A narrow home can still accommodate three bedrooms by using multiple levels or efficient room layouts. One possible two-story configuration is: Ground floor Second floor Another option is to place the primary suite on the uppermost floor of a three-story home.

2 Bed House Plans: Practical and Stylish Home Design Ideas
2 bed house plans are a popular choice for couples, small families, retirees, first-time homeowners, and anyone who wants a comfortable home without maintaining a large property. With thoughtful planning, a two-bedroom house can provide generous living space, functional storage, comfortable bedrooms, and attractive indoor-outdoor connections. A two-bedroom home does not have to feel small. The right floor plan can make efficient use of every square foot by reducing unnecessary hallways, combining living areas, incorporating flexible rooms, and positioning bedrooms for privacy. Two-bedroom house plans are available in many architectural styles and configurations. You can find compact single-story cottages, modern ranch homes, farmhouse designs, narrow-lot houses, contemporary homes, and two-story layouts. The best plan depends on your lot, budget, lifestyle, household size, and future needs. What Are 2 Bed House Plans? 2 bed house plans are architectural layouts designed with two primary bedrooms. Depending on the design, the home may include one or more bathrooms, a kitchen, living room, dining area, laundry, storage, garage, porch, patio, or flexible workspace. A typical two-bedroom plan may include: Some larger two-bedroom homes also include: Two-bedroom designs are available in many sizes, so the number of bedrooms alone does not determine how spacious the home will feel. Why Choose a Two-Bedroom House Plan? There are several reasons homeowners choose a two-bedroom layout. Affordable and Efficient A smaller home can require less material, energy, and maintenance than a larger property, although actual construction costs vary considerably by location, materials, labor, site conditions, and design. Easy to Maintain With fewer rooms to clean and maintain, a two-bedroom home can be convenient for busy households and people who prefer a simpler lifestyle. Flexible The second bedroom can serve many purposes beyond sleeping. It can become: Suitable for Smaller Households Couples and small families can often organize their daily activities efficiently in a two-bedroom home. Popular Types of 2 Bed House Plans Two-bedroom homes come in a wide variety of configurations. 1. Single-Story 2 Bed House Plans Single-story designs are among the most practical options for people who want all essential rooms on one level. A typical arrangement might include: Front: Entry and living room Center: Kitchen and dining area Rear: Two bedrooms and bathroom Another arrangement may place the bedrooms on opposite sides of the home for additional privacy. Single-story homes can also be useful for homeowners planning to remain in the property for many years because there are no stairs between everyday living spaces. 2. Two-Story 2 Bedroom House Plans A two-story house can provide more separation between living and sleeping areas. The first floor might contain: The second floor could include: This approach can work well on smaller lots because the house uses vertical space rather than requiring a larger footprint. 3. Narrow 2 Bed House Plans Narrow house plans are designed for lots where width is limited. These homes often use depth efficiently by organizing rooms in a front-to-back sequence. Useful design strategies include: A narrow plan can be especially useful in urban or infill developments where lots may be constrained. 4. Cottage-Style 2 Bed House Plans A two-bedroom cottage can provide a cozy and welcoming home. Common features include: Cottage plans can work well for couples, retirees, vacation properties, and smaller households. 5. Ranch-Style 2 Bed House Plans Ranch homes are typically single-story designs with a horizontal layout. A two-bedroom ranch can include: The layout can be particularly convenient because all rooms are accessible without stairs. 6. Modern 2 Bed House Plans Modern two-bedroom plans often emphasize open spaces, clean lines, natural light, and flexible interiors. Potential features include: A modern design does not have to be large. Good proportions and efficient circulation can make a compact home feel spacious. Bedroom Layout Ideas The position of the bedrooms can dramatically affect privacy and functionality. Split-Bedroom Layout A split-bedroom plan places the primary bedroom on one side of the house and the second bedroom on the other. The living area sits between them. This arrangement can provide greater privacy and work well for couples who occasionally have guests. Side-by-Side Bedrooms Both bedrooms can be located along the same hallway. This configuration is straightforward and can simplify plumbing and circulation. Front-and-Rear Bedrooms One bedroom can face the front of the house while the other is positioned toward the rear. This can provide separation while allowing both bedrooms access to exterior windows. Primary Bedroom Design Even in a smaller two-bedroom house, the primary bedroom can be designed as a comfortable retreat. Consider including: The primary bedroom does not necessarily need to be oversized. Efficient furniture placement can create a comfortable room without using excessive floor area. Second Bedroom Ideas The second bedroom should be designed with flexibility in mind. It can function as a conventional bedroom while also serving another purpose. For example: Guest bedroom + office Add a compact desk and storage to create a dual-purpose space. Bedroom + study A built-in desk can create a dedicated study area. Bedroom + hobby room Storage cabinets can accommodate craft supplies, books, or equipment. Planning for multiple uses makes a two-bedroom home more adaptable. Kitchen Layouts for 2 Bed House Plans The kitchen often becomes the central working area of the home. Several kitchen configurations can work well. One-Wall Kitchen A one-wall kitchen places appliances and cabinets along a single wall. It is compact and can work well in small open-plan homes. L-Shaped Kitchen An L-shaped kitchen uses two adjoining walls and can provide more counter space. Galley Kitchen A galley kitchen places cabinets and appliances on opposite sides. It can be highly efficient but needs enough circulation space. Kitchen With Island A kitchen island can provide: The island should be appropriately sized so that circulation remains comfortable. Open-Concept 2 Bed House Plans Open-concept layouts combine the kitchen, dining area, and living room into one connected space. This can make a two-bedroom home feel larger because there are fewer visual barriers. Benefits can include: However, some homeowners prefer separate rooms because they provide more privacy and
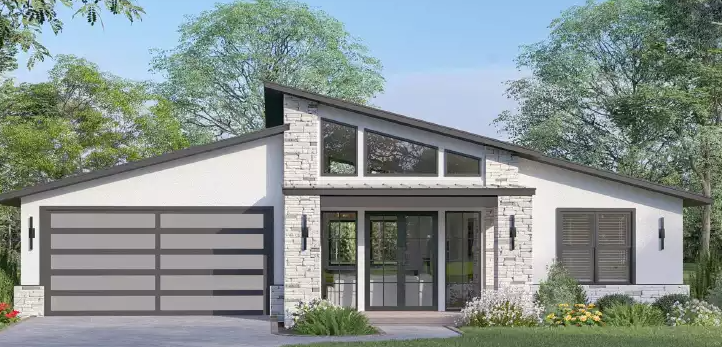
2000 SF House Floor Plans: Modern Layout Ideas and Design Guide
Choosing the right 2000 sf house floor plans can make a significant difference in how comfortable, functional, and attractive a home feels. A 2,000-square-foot house provides enough space for multiple bedrooms, comfortable common areas, storage, bathrooms, and flexible spaces while remaining manageable for many households. There is no single way to use 2,000 square feet. Depending on the family’s needs and the shape of the lot, a home of this size can be designed as a single-story ranch, a two-story family home, a modern open-concept house, a farmhouse, or a plan with dedicated office and guest spaces. Current 2,000-square-foot plan collections commonly include one- and two-story designs, with options ranging from approximately two to four bedrooms and different garage configurations. The key is to choose a layout that matches the way you actually live rather than focusing only on the total square footage. What Are 2000 SF House Floor Plans? 2000 sf house floor plans are architectural layouts designed around approximately 2,000 square feet of living or heated floor area. Depending on the design, the square footage may be arranged on one level or divided between multiple floors. A typical plan may include: Many plans in this size range are designed around three bedrooms and two bathrooms, while four-bedroom versions are also available. Is 2,000 Square Feet a Good House Size? For many households, 2,000 square feet offers a useful balance between living space and efficient planning. It can provide enough room for a family to have private bedrooms while maintaining generous shared spaces for cooking, dining, relaxing, and entertaining. The same square footage can feel very different depending on the floor plan. A poorly organized 2,000-square-foot home can feel cramped, while an efficient design can feel considerably more spacious. Factors that affect how the home feels include: Popular 2000 SF House Floor Plans There are several popular ways to organize a 2,000-square-foot home. 1. Three-Bedroom Open-Concept Plan A three-bedroom plan can dedicate more square footage to living areas. A possible arrangement includes: This configuration is particularly useful for families who value spacious common areas. A 2,000-square-foot plan with three bedrooms and two bathrooms is one of the common configurations available from house-plan providers. 2. Four-Bedroom Family Plan A four-bedroom layout provides additional private rooms but requires more careful allocation of space. The fourth bedroom can be used as: The trade-off is that bedrooms and shared spaces may be somewhat smaller than in a three-bedroom design. 3. Split-Bedroom Floor Plan A split-bedroom design places the primary suite away from the secondary bedrooms. For example: Left side: Primary bedroom, bathroom, and closet Center: Kitchen, dining, and living areas Right side: Two or three secondary bedrooms and shared bathroom This creates separation between the primary bedroom and children’s or guest rooms. Split-bedroom arrangements are available among 2,000-square-foot plan designs. 4. Two-Story 2000 SF House Plan A two-story design divides the living space between two levels. The first floor might contain: The second floor might contain: One advantage of a two-story design is that it can reduce the home’s footprint, potentially leaving more room on the lot for outdoor space. One-Story vs. Two-Story 2000 SF Homes One of the biggest decisions is whether to build all 2,000 square feet on one level or divide it between two floors. One-Story Design A single-level home offers convenient movement between rooms. Benefits include: A ranch-style 2,000-square-foot home can work particularly well for homeowners who prefer single-level living. Current plan collections include one-story 2,000-square-foot options in ranch and other architectural styles. Two-Story Design A two-story home uses vertical space. Benefits can include: However, stairs occupy floor area and may be less convenient for some households. Designing the Main Living Area The kitchen, dining area, and living room often form the central gathering space in modern 2000 sf house floor plans. An open arrangement can provide long sightlines and make the interior feel larger. Great Room A great room can combine: This arrangement is especially useful for families who spend much of their time together. Kitchen Island A kitchen island can provide: The size of the island should be appropriate for the kitchen. Leaving sufficient circulation around appliances and cabinets is more important than simply choosing the largest possible island. Walk-In Pantry A pantry can reduce clutter in the main kitchen. Depending on the plan, it may be a small closet-style pantry or a larger walk-in space. Primary Bedroom Planning The primary bedroom is often one of the most important spaces in a 2,000-square-foot home. A comfortable primary suite may include: The suite should be positioned to provide privacy from high-traffic areas. In a split-bedroom layout, the primary suite may be placed on one side of the home while secondary bedrooms occupy the opposite side. Secondary Bedrooms A typical three-bedroom plan can provide two additional bedrooms beyond the primary suite. These rooms can serve different purposes depending on the household. For example: A four-bedroom layout can provide additional flexibility but may reduce the size of common areas. Home Office in a 2000 SF Floor Plan A home office is a useful addition for households that work remotely. There are several ways to include one without sacrificing a bedroom. Dedicated Office A separate office provides the most privacy and can be closed off from the rest of the home. Flex Room A flex room can serve as an office during the week and guest room when needed. Built-In Workspace A small desk area can be incorporated into a hallway, loft, kitchen, or bedroom when space is limited. The best option depends on how frequently the workspace will be used. Laundry Room Placement Laundry placement can have a major impact on everyday convenience. In a one-story plan, the laundry room can be positioned near the bedrooms. In a two-story house, some homeowners prefer an upstairs laundry room to reduce the need to carry clothing between floors. Useful laundry-room features include: Garage Options A 2,000-square-foot home can be designed with different garage configurations. Common options include: Some 2,000-square-foot plans combine
